An image eraser is a tool that removes unwanted objects, people, or text from a photo and fills the gap so the edit looks natural. To use one, mark the area you want gone and the tool erases it. The FindUtils Image Eraser does this in your browser — free, with no signup, no watermark, and no file upload.
This guide explains when to erase parts of an image, how to do it step by step, what makes an erase look clean versus obvious, and the mistakes that leave a visible smudge behind.
Why Erase Objects from a Photo?
Erasing objects from a photo removes distractions so the subject stands out. It cleans up an otherwise good shot without retaking it — removing a passerby, a sign, a date stamp, or a stray item from the frame.
A single distracting element can ruin an image that is otherwise perfect. Reshooting is often impossible — the moment is gone, or the location is no longer available. Erasing fixes the photo you already have.
Erase objects when:
- A stranger walked into the frame of an otherwise clean shot.
- There is a distracting object — a trash can, a cable, a sign — pulling attention from the subject.
- You need to remove text or a watermark from your own image.
- A product photo has clutter in the background that should be plain.
- A date stamp or logo is burned into a corner of the photo.
How to Erase Objects from an Image Online
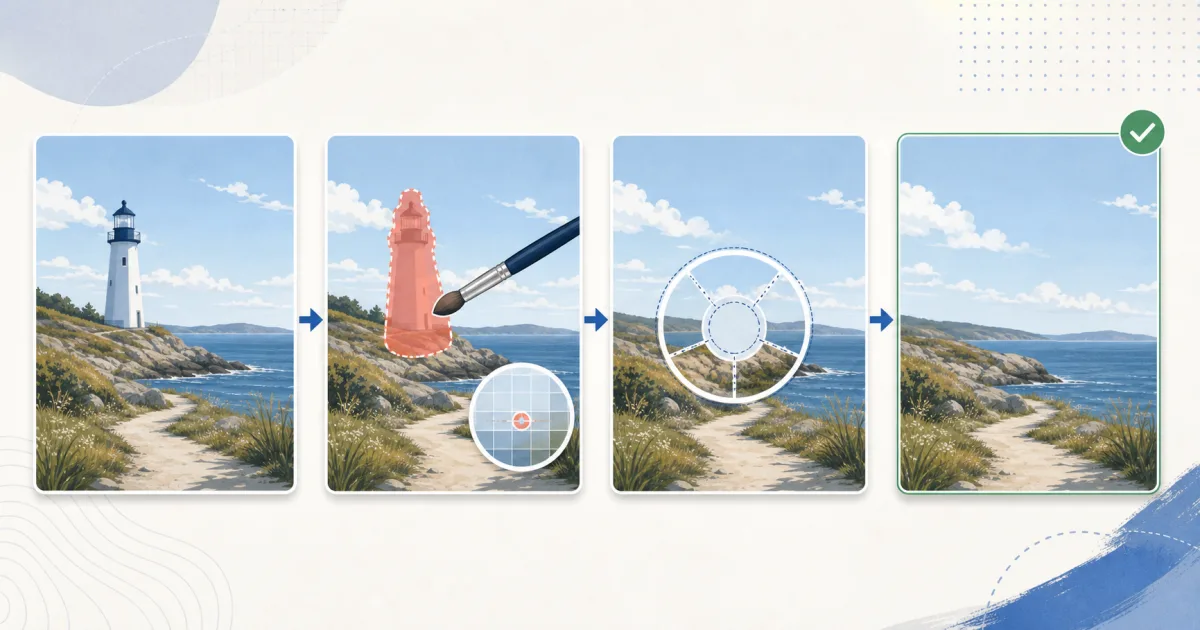
Erasing an object takes three steps: load the photo, mark what to remove, and export. The FindUtils Image Eraser processes everything in your browser, without a separate upload of the selected photo.
Step 1: Load Your Image
Open the FindUtils Image Eraser and select your photo. Because editing happens client-side, the image is read directly from your device and never uploaded.
Step 2: Mark the Area to Remove
Brush over the object you want gone. Cover the whole object plus a small margin around its edges — leaving part of an object behind is the most common cause of a poor result.
Step 3: Apply the Erase
Run the erase. The browser loads the selected inpainting model when needed. The model uses the image and mask to generate replacement pixels. Review the result before you export it.
Step 4: Refine and Export
Inspect the result at full size. If an edge or smudge remains, brush over it again and re-apply. When the edit looks clean, export and download the finished image.
What Makes an Erase Look Clean
Erasing works best on certain images and struggles on others. Knowing the difference sets realistic expectations.
| Image type | Erase difficulty | Why |
|---|---|---|
| Object on a plain or simple background | Easy | Surrounding pixels are uniform and easy to fill |
| Object on grass, sky, sand, or water | Easy to moderate | Texture is repetitive and blends well |
| Object overlapping a complex pattern | Moderate | Fill must reconstruct detailed structure |
| Object in front of a face or fine detail | Hard | The tool cannot invent missing detail accurately |
| Large object covering most of the frame | Hard | Too little surrounding context to fill from |
The model estimates replacement content from the image context. It does not recover a record of what was behind the object. Fine details, repeated patterns, and large masked areas need careful review.
Image Eraser: Online Tool vs Paid Photo Editors
A free in-browser eraser handles the common cleanup task; paid editors add a full retouching suite. Here is the honest comparison.
| Capability | FindUtils |
|---|---|
| Signup required | No |
| Watermark | None |
| Processing time | Depends on model loading, image size, and device |
| Full retouching suite | Erase-focused |
Use the eraser for a selected object or area. Use a full editor when the task also needs layers or detailed color adjustment. The first run can include a model download.
Common Image Erasing Mistakes and How to Fix Them
Mistake 1: Not Covering the Whole Object
Leaving a sliver of the object unmarked leaves a visible fragment behind. Fix it by brushing over the entire object plus a small margin past its edges.
Mistake 2: Erasing Over Critical Detail
Removing an object in front of a face or fine pattern forces the tool to invent detail it cannot know. Fix it by accepting that objects over complex detail erase poorly, and choosing a different photo when possible.
Mistake 3: Doing It All in One Pass
A large or complex object rarely erases perfectly in a single attempt. Fix it by working in stages — erase, inspect, then touch up any remaining smudges.
Mistake 4: Skipping the Full-Size Review
An erase can look fine in a small preview but show a smudge at full resolution. Fix it by always reviewing the export at full size before using the image.
Mistake 5: Erasing Before Cropping
Spending effort erasing an object you will later crop out wastes time. Fix it by cropping the photo first, then erasing only what remains in the final frame.
Tools Used in This Guide
- Image Eraser — Remove unwanted objects and text from photos
- Photo Editor — Crop, adjust, and retouch images in your browser
- Image Compressor — Compare image compression settings and output quality
- Image Resizer — Resize photos for the web and social media
FAQ
Q1: Is the image eraser free to use? A: Yes. The FindUtils Image Eraser is available without signup. It adds no watermark. It runs in your browser — your photo is never uploaded to a server.
Q2: When should I use this image eraser? A: It removes objects, people, and text from photos, adds no watermark, and performs this operation in the browser.
Q3: Can I remove objects from a photo without uploading it? A: Yes. The FindUtils Image Eraser processes images entirely in your browser. The local editing path reads the selected photo on your device. The model can require a download before processing.
Q4: Can an image eraser remove anything from a photo? A: It works best on small-to-medium objects on plain or textured backgrounds. It struggles when an object covers faces or fine detail, because the model estimates replacement content instead of recovering the original hidden scene.
Q5: Is it safe to erase parts of an image online? A: Use a copy of the photo. Check that you have permission to edit and share it.
Q6: Can I remove a watermark from a photo? A: You can remove a watermark from an image you own or have the rights to edit. Removing watermarks from images you do not own may violate copyright, so only erase watermarks on your own content.
Q7: Why does my erased area still look smudged? A: A smudge usually means part of the object was not marked, or the background was too detailed to fill cleanly. Brush over the remaining area again, or choose a photo with a simpler background.
Next Steps
- Crop and adjust your photo with the Photo Editor
- Shrink the file with the Image Compressor
- Resize it for social media with the Image Resizer
- Read the complete guide to online image tools for more free utilities